


Solutions
Product help is always close. Find instructions, watch a video, or get in touch.
How-to guides
-
CAP & FILLING REPAIRCap & Filling Repair InstructionsHow-to videoFAQs
Dentemp Cap & Filling Repair provides fast relief of pain and discomfort until you can see your dentist. Dentemp Cap & Filling Repair is pleasant tasting, safe and effective.
To Replace a Lost Filling
Wash hands. Rinse out cavity with warm water. Do not dry; leave moist. Use applicator to remove a small amount of material from vial, form into a ball with wet fingers and press firmly into cavity. Scrape the material off your finger by scraping your finger along the edge of the tooth. Do not lift your finger straight up as this might loosen the material in the cavity. Bite down several times to ensure proper bite. REMOVE ANY EXCESS MATERIAL. RINSE OUT MOUTH WELL. Allow two (2) hours to set before eating.
To Re-cement Loose Caps or Crowns
Wash hands. Prepare crown by carefully removing as much old cement as possible from inside the crown. Rinse well. Clean and rinse tooth area with water and leave moist. Fit the crown back on the tooth before applying new material. Make sure it fits properly. If you cannot do this, DO NOT PROCEED. See your dentist. Use applicator to remove a small amount of material from vial. Place a very small amount of material along the inside edge of the open end of the crown. Place crown on wet tooth and press firmly. Bite down several times to ensure proper fit. If the bite is not completely comfortable, remove and repeat all steps until the crown feels normal. REMOVE ANY EXCESS MATERIAL. RINSE OUT MOUTH WELL WITH WATER. Allow at least two (2) hours to set before eating. Dentemp Premium Dental Repair can be used to replace a bridge. Dentemp Premium Dental Repair should not be used on implants or posts without dentist’s advice.
How-to video
Read directions carefully before using. Keep out of reach of children.
Caution
This product should not be used if throbbing pain or swelling in affected area exists. Consult your dentist immediately. This product is sold as a temporary remedy. See your dentist as soon as possible for permanent work to be performed. Failure to do so may cause infection and/or serious injury. Store at room temperature with container closed to keep material soft. Lot code on container.
Should I use Dentemp if I have throbbing pain or swelling in the affected area?
No. You should consult your dentist immediately. This may be an indication of infection.
When replacing a cap or crown, should I put the cement directly into the center of the cap or crown?
No. Place a small amount of the cement on the upper inside wall of the cap or crown. Place the cap or crown on the tooth and press firmly for several minutes.
When replacing a lost filling, how do I get the ball of cement to stay in the hole?
Place the ball on the tip of your finger and put the ball into the hole of your tooth. Then disengage the cement from your finger by scraping your finger along the side of your tooth.
Should Dentemp be used on a post or implant?
It differs from case to case. Before using on a post or implant, seek your dentist’s advice.
Can Dentemp be used to repair a broken tooth?
No. You should consult your dentist.
Can Dentemp be used to repair a denture?
No. You should use Repair-it or consult your dentist.
Will I get sick if I accidentally swallow Dentemp?
No.
Is there any type of crown on which Dentemp should not be used?
No. Dentemp can be used on any type of crown.
What is Eugenol?
Eugenol is the main ingredient in clove oil.
Can I use Dentemp if I am nursing? If I have a latex allergy? If I have high blood pressure?
Yes. Yes. Yes.
Can I use Dentemp while pregnant?
Consult your obstetrician.
Is Dentemp gluten free?
Yes.
Can Dentemp be used on children?
Consult your dentist or pediatrician.
My pet got a hold of the product and swallowed it, is it toxic?
Product is nontoxic.
Can product be used on gold crowns?
It depends on how the crown is made. It may work.
Can product be easily removed by dentist?
Yes.
Can product be used to attach fangs for Halloween?
No. Product is not intended for this use.
Buy now Cap & Filling RepairCalcium Sulfate, Barium Sulfate, Diethylene Glycol Monoethyl Ether Acetate, Zinc Oxide, Eugenol, Ethylmethacrylate Polymer, Potassium Sulfate.
-
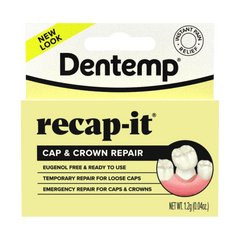
CAP & CROWN REPAIRRecap-It InstructionsFAQs
Dentemp Recap-It Cap & Crown Repair is a unique, no mix cement made especially for replacing loose caps and crowns. Tested, safe and effective.
Directions
Wash hands. Prepare crown by carefully removing as much old cement as possible from inside the crown. Rinse well. Clean and rinse tooth area with water and leave moist. Fit the crown back on the tooth before applying new material. Make sure it fits properly. If you cannot do this, DO NOT PROCEED. See your dentist. Make sure inside of crown is dry. Unscrew cap from syringe. Press the plunger to apply a small amount of material onto the upper inside edge of the crown. Remoisten tooth area, place crown on wet tooth and press firmly. Bite down several times to ensure a proper fit. If the bite is not completely comfortable, remove and repeat all steps until the crown feels normal. WAIT 5 MINUTES AND THEN GENTLY REMOVE ANY EXCESS MATERIAL. RINSE OUT MOUTH WELL WITH WATER. Allow at least 1 hour to set before eating. Cement will fully set in 1 to 3 hours.
NOTE: When replacing a bridge, apply material sparingly to only 1 hollow tooth at each end of the bridge. Dentemp Recap-It Cap & Crown Repair should not be used on implants or posts without dentist’s advice.
Read Directions carefully before using. Keep out of reach of children.
CAUTION
This product should not be used if throbbing pain or swelling in affected area exists. Consult your dentist immediately. This product is sold as a temporary remedy to be used for less than 30 days. See your dentist as soon as possible for permanent work to be performed. Failure to do so may cause infection and/or serious injury. Store at room temperature with cap tightly secured. Protect from light. Lot code on outer packaging. Do not use after the expiration date.
Why can’t I get all the liquid out of the tube?
The tube is actually filled to 2.0 grams even though the stated fill states 1.2 grams. The cap/crown needs very little liquid to keep it in place so it is possible that the liquid is being over used. If necessary, roll the flattened end of the tube to help squeeze out the liquid.
Can product be used to recement bridges or other dental appliances?
No. This product is only for recementing caps/crowns.
Can Recap-It be used on a tooth with build-up for the cap/crown?
No, we do not recommend using Recap-It on tooth build-up.
Buy now Recap-ItCalcium Sulfate, 2 -( 2-Methoxyethoxy)ethyl methacrylate, Potassium Sulfate, Ethyl Methacrylate Polymer, Zinc Oxide, Triacetin, Eugenol
-
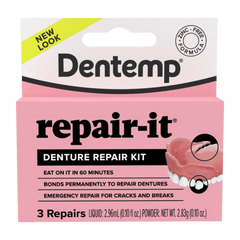
DENTURE REPAIR KITRepair-It InstructionsHow-to videoFAQs
Hint: If, while mixing, the material hardens too fast for the mixture to become smooth and creamy then please try again but first put the liquid into a freezer for 1⁄2 hour to slow hardening.
Step 1: Clean and dry pieces of the denture or tooth. Make sure there are no missing pieces and that everything fits properly back together. If you cannot do this, the denture will not fit when repaired. Do not proceed. See your dentist immediately.
Step 2: Mix denture repair liquid and powder as follows:
- Place contents of one Repair-It Powder packet into one of the enclosed mixing cups.
- Hold a Repair-It Liquid packet in one hand and gently tear off the notched end so as not to spill any of the liquid. Hold the open end of the packet directly over the powder and add all of the liquid to the powder in the mixing cup. Be careful not to get any Repair-It Liquid onto your skin. This liquid is flammable. Do not use near sparks or an open flame. Use in a well ventilated area.
- Using the spatula, mix until the mixture becomes smooth with a creamy consistency, like syrup.
Step 3: Using the spatula, apply a small amount of the denture repair mixture to each broken edge of the denture or in the missing tooth area. Make sure that each broken edge has a thin coating of the denture repair mixture.
Step 4: Immediately fit the broken pieces of the denture together, or press the tooth into position. Make absolutely sure that all pieces fit together properly and are in correct alignment.
Step 5a: For Cracked or Broken Dentures: Press the pieces together and hold in place for five (5) minutes. Be sure that the pieces stay in perfect alignment. Skip to Step 8.
Step 5b: For a Loose or Broken Tooth: Press the tooth in position and hold for one (1) minute. Be sure that the pieces stay in perfect alignment. Move on to Step 6.
Step 6: Gently remove excess material carefully using a wet cotton tipped applicator.
Step 7: Allow to set for an additional four (4) minutes while holding the pieces in place.
Step 8: Using the clean end of the spatula, carefully scrape away any extra material that has squeezed out.
Step 9: Soak repaired denture in hot tap water (not boiling) for 10 minutes.
Step 10: Remove denture from water. Dry carefully.
Step 11: If necessary, use high grit sandpaper to lightly smooth out any rough spots.
Step 12: Wash denture and spatula with soap and water. Wash hands thoroughly. Allow any remaining material to thoroughly dry, then dispose in household garbage.
NOTE: After repairs have been completed, if for any reason the denture is uncomfortable or does not fit, do not use it. See your dentist immediately.
How-to video
Do Not Use for loose caps or lost fillings.(Use Dentemp Cap & Filling Repair)
Do Not Use to reline a denture.(Use Dentemp Reline-it Denture Reliner)
Repair-It is intended to be used as a single use, short-term, emergency remedy only, used for less than 30 days. The user should see a dentist as soon as possible to replace the denture.
READ DIRECTIONS CAREFULLY BEFORE USING. KEEP OUT OF REACH OF CHILDREN. Do Not Use for loose caps or lost fillings. Do Not Use to reline a denture. WARNING: Denture repair liquid is flammable. Keep away from heat, open flames or sparks. WARNING: Avoid getting denture repair liquid on skin. If you do, wash area with water immediately. WARNING: Do not use on Valpast dentures (flexible dentures). WARNING: Contains methacrylates. Do not use if you are allergic or sensitive to methacrylates. Caution: Do not put repaired denture back into your mouth until the denture repair material has hardened. Caution: Fit pieces together properly. Once this product hardens it can not be removed.
IMPORTANT: Special training and tools are needed to repair dentures to fit properly. Home-repaired dentures may cause irritation to the gums and discomfort and tiredness while eating. Long-term use may lead to more troubles, even permanent changes in bones, teeth, and gums, which may make it impossible to wear dentures in the future. For these reasons, dentures repaired with this kit should be used only in an emergency until a dentist can be seen. Dentures that don’t fit properly cause irritation and injury to the gums and faster bone loss, which is permanent. Dentures that don’t fit properly cause gum changes that may require surgery for correction. Continuing irritation and injury may lead to tumors in the mouth. You must see your dentist as soon as possible.
WARNING: For emergency repairs only. Long-term use of home repaired dentures may cause faster bone loss, continuing irritation, sores and tumors. This kit is for emergency use only. See dentist without delay. A new denture may be required.
Can I use Repair-It if a piece of my denture is missing?
No, Repair-It is only intended to bond existing pieces. If a piece is missing, do not use the product. Contact your dentist for professional repair.
Do I have to use the entire packet of powder if I am just fixing one tooth on my denture?
Yes, you have to use one packet of liquid and one packet of powder for each repair.
What if the material hardens too quickly while mixing?
If the mixture hardens before it becomes smooth and creamy, try placing the liquid component in the freezer for about 30 minutes before your next attempt. This slows the curing process and gives you more time to mix.
What is the likelihood of issues related to “long-term” use that are outlined in the instructions?
While bone loss, irritation, sores and tumors are possible side effects of longterm use of home-repaired dentures, the incidence rate is relatively low. However, due to the fact that these issues can occur, we recommend that you ultimately see a dentist for a professional repair.
Can I use this product if I’m sensitive to methacrylates?
No, do not use Reline-It if you have a known sensitivity to methacrylates or other ingredients.
Can Repair-It be used on lower dentures?
Yes. Repair-It can be used on traditinal acrylic dentures, both upper and lower.
Can Repair-It be used on partial dentures?
Yes. Repair-It can be used on traditinal acrylic partial dentures
Can Repair-it be used on a Valplast (flexible) denture?
No.
Can Repair-It be used on 3D printed dentures?
No.
Can I use Repair-It past its expiration date?
We do not recommend using the product past its expiration date, as we cannot guarantee its safety or effectiveness.
I lost my tooth from my denture. Can I rebuild one with this product?
No. Product is not intended for this use.
Does your Repair-It contain replacement teeth?
No.
Can you smoke after the use of this product? Is it flammable?
Once Repair-It has been used according to the directions, and the Repair-it has set the denture will be safe to use as normal.
When can I eat or drink after applying Repair-It?
Wait at least 3 hours before eating or drinking to ensure the repair has fully set.
How do I clean my dentures after using Repair-It?
Clean your dentures as usual using a soft brush. Be gentle around the repaired area.
Can you soak dentures in cleaning tablets over night?
Yes. Please follow the instructions for the denture cleanser.
Can this product be used to re-cement a crown?
No. Product is not intended to be used on natural teeth.
Can this product be used on natural teeth?
No.
How do you remove product if repaired incorrectly?
You must contact your dentist.
How long will this product hold?
Product is for temporary use only and works differently for each individual.
Buy now Repair-ItLiquid - Methyl Methacrylate, Hydoquinone
Powder - Poly(methyl methacrylate)
-
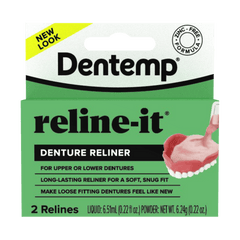
DENTURE RELINERReline-It InstructionsHow-to videoFAQs
Step 1: Clean and dry denture thoroughly.
Step 2: Place one packet of powder and one packet of liquid into a freezer for 15 minutes. IMPORTANT, DO NOT SKIP THIS STEP.
Step 3: Immediately upon removal from the freezer, quickly mix reliner liquid and powder as follows:
- Place contents of one Reline-it Powder packet into one of the enclosed mixing cups.
- Hold a Reline-it Liquid packet in one hand and gently tear off the notched end so as not to spill any of the liquid. Hold the open end of the packet directly over the powder, and add ALL of the liquid to the powder in the mixing cup. (Be careful not to get any Reline-it Liquid onto your skin. This liquid is flammable. Do not use near sparks or an open flame. Use in a well ventilated area.)
- Using the spatula, mix until the mixture becomes smooth with a creamy consistency, like syrup.
Step 4: Continue to mix for 30 seconds, then immediately pour the mixture onto the denture and spread evenly across the surface.
Step 5: Allow the mixture to set for 3 more minutes. Make sure that your gums and palate are moist, then place the denture into your mouth.
Step 6: Bite down, and hold the denture in the correct biting position for 6 minutes (Figure 4). A slight tingling sensation of the gums or palate may be experienced. NOTE: A small number of people may have a sensitivity to this product. If the tingling makes you feel uncomfortable, remove the denture immediately and remove the reline material from the denture. See your dentist for relining.
Step 7: Take out of mouth and rinse with COLD water.
Step 8: Using the enclosed spatula, trim off any excess material that overlapped denture.
Step 9: Place denture in HOT tap water (not boiling) and let set for 20 minutes. Then add 1 teaspoon of Baking Soda to 1 cup of warm water, and soak the denture for another ten minutes to remove any taste. Alternatively, soak denture in your usual denture cleaner following their instructions.
Step 10: Wash (rinse) denture again in cold water, and trim any excess material from denture that was left behind the first time.
Step 11: Place denture back into mouth to begin using.
Step 12: Rinse off spatula and save for future use. Wash hands thoroughly.
NOTE: After relining has been completed, if for any reason the denture is uncomfortable or does not fit, do not use it. Remove the liner material and see your dentist immediately.
NOTE: How to remove Reline-it - Do not use any sharp or metal objects. Using your thumb, keep lifting from the underside edge of the reline until enough is lifted where you can grab it with 2 fingers and peel it off gently. If you have difficulty, contact us for help or ask your dentist.
How-to video
READ DIRECTIONS CAREFULLY BEFORE USING. KEEP OUT OF REACH OF CHILDREN.
WARNINGS: Denture reliner liquid is flammable. Keep away from heat, open flames or sparks; Avoid getting denture reliner liquid on skin. If you do, wash area with water immediately. Contains methacrylates. Do not use if you are allergic or sensitive to methacrylates or other ingredients. Do not use on 3D Printed Dentures or Valplast (soft/flexible) Dentures. Do not inhale vapors from denture reliner liquid. Use in a well-ventilated area. Do not use over an existing reline. Remove old reline first. For temporary refitting of dentures between dental visits. For best results, use up to one week per application. Improper or long term use of denture cushions, pads or reliners may lead to faster gum erosion, irritation and sores. For use only until a dentist can be seen.
Is Reline-It a denture adhesive?
No, Reline-It is a denture reliner. It does not adhere directly to your gums but rather gives your dentures a better fit.
What can I do about lumps in the material when I mix the liquid and powder?
Make sure to squeeze all the liquid out of the packet to achieve the correct consistency.
The product is hardening too quickly during application. What should I do?
Before mixing, place one unopened packet of powder and one unopened tube of liquid into a freezer for 15 minutes. Putting the product in the freezer will slow down the quick set up time.
What if I left Reline-It in the freezer for more than 15 minutes?
If the product has been in the freezer for over 30 minutes, it may not mix properly. Let it sit at room temperature to thaw until it softens slightly but remains cool before use.
Can I use Reline-It past its expiration date?
We do not recommend using the product past its expiration date, as we cannot guarantee its effectiveness.
Will there be an odor while I am mixing the powder and liquid?
Yes. Mix in a well-ventilated area.
Can I use this product if I’m sensitive to methacrylates?
No, do not use Reline-It if you have a known sensitivity to methacrylates or other ingredients.
How long does each Reline-It application last?
Each application is intended to last up to 1 week for optimal comfort and effectiveness.
How long should I wait before eating or drinking after application?
Wait at least 3 hours before eating or drinking anything other than water.
Will I feel anything during the step where Reline-it shapes itself to my palate or gums?
You might feel a slight tingling sensation. This is normal and will disappear once the material is set after the final cure. NOTE: A small number of people may have sensitivity to this product. If the tingling makes you feel uncomfortable, remove the denture immediately and remove the reline material from the denture. See your dentist for relining.
Does Reline-It taste bad?
It might. After the Reline-it has shaped itself to your palate and has been placed in hot water for 20 minutes to set, place the denture in warm tap water with one teaspoon of Baking Soda for an additional 10 minutes.
How do I remove Reline-It?
Do not use any sharp or metal objects. Using your thumb, keep lifting from the underside edge of the reline until enough is lifted where you can grab it with two fingers and peel it off gently. If you are having difficulty, Soak in ice water, more ice than water, for a minimum of 4 hours, then take a toothpick or something pointed but not metal and get under the edge, It should flake off. If that doesn’t work then please contact your dentist for help.
Can Reline-It be used on lower dentures?
Yes. Reline-It can be used on lower or upper dentures.
Can Reline-It be used on partial dentures?
Yes, it can be used underneath the pink portion of acrylic partial dentures. Reline-it will not work on the metal portion of the partial denture.
Can Reline-It be used on Valplast (flexible) dentures?
No.
Can Reline-It be used on 3D printed dentures?
No.
How should I clean my dentures with Reline-It applied?
You can follow your usual cleaning routine. Gently brush or use a non-abrasive denture cleaner as directed.
Can you still use cleaning tablets to soak your denture?
Yes, but we suggest to follow the instructions on the packaging, soak according to directions.
Can Denture adhesive be used if denture still fits loose?
Yes.
After putting liner in denture it still feels loose, can another liner be placed over it?
No. If denture still feels loose product needs to be removed and reapplied. This can happen if you bite down too hard during the molding stage. Use normal biting pressure.
Can Reline-It be used over a hard or soft liner put in by Dentist?
Reline-it can be used over a hard liner only. Product is not to be used over a soft liner as it will not be able to be removed later.
Buy now Reline-ItLiquid - Ethyl Alcohol, Ethyl Acetate
Powder - Poly(ethyl methacrylate)
-
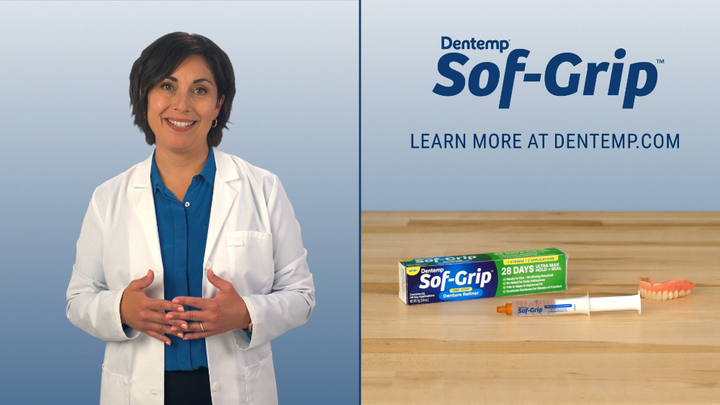
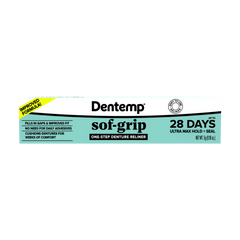
ONE-STEP DENTURE RELINERSof-Grip InstructionsHow-to videoFitting tips
Step 1: Thoroughly wash and dry dentures, taking care to remove all previously applied fixative and liner, if applicable.
Step 2: Warm Sof-Grip by placing the capped syringe in a cup or mug of very hot water (hotter than tap water but not boiling) for 2-3 minutes.
Step 3: Remove the cap and gently push a steady stream of resin onto the fitting surface of the denture. Referencing the markings on the syringe, use about 2mL-3mL per denture. For lower dentures, apply the product to the gum channel. For upper dentures, apply the product to the gum channel and in a zig-zag pattern across the palette.
NOTE: If resin is difficult to push out of syringe, place the syringe in hot water for another minute. Be sure to use at least 2.5mL for full upper dentures for the best adhesion.
Step 4: With wet fingers, spread the resin over the denture. Smooth the material out evenly. If the resin cools too quickly and is difficult to spread, place the denture, with resin, in the hot water for 10-15 seconds and spread again.
Step 5: Place denture in mouth and with clenched teeth, move jaws side to side 5 times, and then gently clench teeth for an additional 2 minutes.
Step 6: Remove denture from mouth and wipe off any surplus resin with wet fingers.
Step 7: Finally, rinse mouth and denture (Figure 4) with cool water before placing denture back in mouth.
Important
After initial application, wear the denture continuously for at least 8 hours. Do not eat for 3 hours. Sof-Grip can be easily removed and if necessary, a fresh quantity may be applied. For persistent denture problems, please consult your dentist.
CLEANING
To keep your dentures clean, Sof-Grip is safe to use with most denture cleaners and light brushing. Use only cool or lukewarm water. Do not use hot water.
Storage
If there is still material in the Sof-Grip syringe after use, securely replace cap and store in a cool, dry place to save for a second reline.
Helpful Tips
- Sof-Grip emits a rather distinct taste and smell during the application process, which will diminish with time. If it persists after 24 hours of regular wear, add 1 teaspoon of Baking Soda to 1 cup of warm water, and soak the denture for ten minutes to help remove any taste or smell. Alternatively, soak denture in your usual denture cleaner following instructions.
- 2mL-3mL is enough material for one full denture, either lower or upper.
- Safe to use with most denture cleansers.
- For a two-part, professional quality reline option, try. Dentemp Reline-It.
How-to video
Fitting tips
Please read all directions carefully before using. Keep out of reach of children.
Sof-Grip is designed for traditional acrylic dentures. It is not designed for 3D Printed or Soft, flexible dentures.
WARNING: Contains methacrylates. Do not use if you are allergic or sensitive to methacrylates or other ingredients.
Buy now Sof-GripPoly(ethyl methacrylate), Alcohol, 1,2,3-Propanetricarboxylic acid, 2-(acetyloxy)-, 1,2,3-tributyl ester
Caution: Contains Alcohol
-
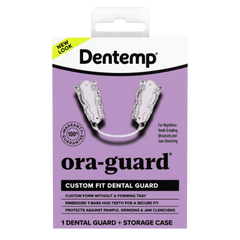
CUSTOM FIT DENTAL GUARDOra-GUARD InstructionsHow-to videoFAQs
Step 1: Heat water, 2-3 inches deep, until it reaches a rolling boil.
Step 2: Remove boiling water from heating source and let stand for 10 seconds.
Step 3: Carefully submerge the Ora-GUARD in the hot water for 30 seconds.
Step 4: Using the slotted spoon or fork, carefully remove the Ora-GUARD from the hot water.
CAUTION: Before placing the Ora-GUARD in your mouth, test its temperature with the tip of your finger. The Ora-GUARD should be at a warm and comfortable temperature.
Step 5: Using a mirror, carefully place the Ora-GUARD on your lower teeth, lining up the “notch” in the center of the band with the center of your lower front teeth.
Step 6: Gently bite down on the Ora-GUARD, and form the material to your teeth and gums by sliding and pressing your fingertips inside your mouth or against your cheeks. NOTE: Do not clench down excessively.
Step 7: Press your tongue firmly against the roof of your mouth, and with a light sucking action, create a vacuum chamber effect by drawing out all the air and water.
Step 8: Continue forming the Ora-GUARD with your fingertips.
Step 9: After a total of 2 minutes in your mouth, place the Ora-GUARD in a bowl of cold water for 5 minutes.
Step 10: You should now have a snug, custom-fit Ora-GUARD. If necessary, you may repeat the fitting process 1 more time to improve your fit.
After each use, brush your dental guard with toothpaste and rinse with cool water. Avoid using hot water. Dry your Ora-GUARD thoroughly and use the provided case to store your Ora-GUARD when not in use.
How-to video
Do not use: Any dental product without first consulting with a dentist; As an athletic guard; If you are under 18 years of age; If you have TMJ pain or clicking of the jaw; If you have teeth or jaw pain; If you have loose teeth; If you have dental implants, braces, dentures, or other dental appliances; For more than 3 months without consulting with a dentist. Ask a dentist before use if you have: Serious health problems such as respiratory issues; Mouth sores, bleeding gums, or gum disease; Cavities without fillings, loose fillings or tooth caps; Difficulty chewing, jaw or teeth pain; Two or more missing teeth. Stop use and ask a dentist if: You develop loose teeth or a change in your bite; Experience pain, bleeding gums or other irregularities; The product falls out of your mouth easily or causes you to gag; The product disrupts breathing. See a dentist every 6 months.
Buy now Ora-GUARDCan it be refitted?
Yes, It can be fitted up to 2 times.
Does it go on the upper or lower teeth?
It is designed for the lower teeth.
Will Ora-GUARD fit if I have a small jaw?
Ora-GUARD is designed with a flexible fit to accommodate most users through its custom fitting process. If the guard extends beyond your last molar after fitting, it may be too large for your mouth.
Does it contain latex?
No
Is Ora-GUARD BPA-free?
Yes
Can a child wear it?
No. All dental guards for bruxism (teeth grinding) are intended for use for ages 18 and up. Children under the age of 18 are still in development so dental guards for bruxism are not recommended.
Does it adhere to dental work like caps?
Please consult with your dentist before using a dental guard with any dental appliances. Any dental work could prohibit from getting a proper fit.
Can I wear it during the day?
It is designed to be worn at night while sleeping.
I have TMJ, can I use this product?
Please consult with your dentist. It is not advised to use if you have TMJ.
Is jaw discomfort normal?
Mild discomfort can occur as your mouth adjusts to a new device. This typically resolves within a week. If pain persists beyond that time, discontinue use and speak with your dentist. Ora-GUARD is not recommended for individuals with TMJ disorders.
What should I do if I experience gum pain?
We recommend refitting your Ora-GUARD to ensure proper placement. If discomfort continues, stop use and consult your dentist.
What if I don't get a good fitting and it falls off?
Sometimes it doesn't seem the material softens enough to mold to the bottom teeth. Try to refit the guard and leave it in the hot water for 45 seconds vs the 30 seconds on the directions. Also, be careful not to bite down too hard.
My teeth hurt after fitting, what should I do?
It may take up to a week to get used to a new device in the mouth, but do not continue prolonged use if the pain is still there after a week.
How do I clean Ora-GUARD?
After each use, gently brush Ora-GUARD with toothpaste and rinse thoroughly with cool water. Avoid hot water, which can damage the device. Let it dry completely before storing it in the included case.
-
CUSTOM FIT DENTAL GUARDProtect-It InstructionsHow-to videoFAQs
TRIMMING: Before forming, wash the dental guard in warm water and try it on. If the dental guard is too big or feels uncomfortable, use scissors to trim away extra length or wall height.
CUSTOM FITTING
READ ALL DIRECTIONS BEFORE BEGINNING.
Heat a bowl of water to a boil. Make sure there is enough water to fully submerge the dental guard.
Remove the water from the heat source for 10 seconds and place the dental guard into the water for 20 seconds.
Use a slotted spoon or fork to remove the dental guard from the water and let cool for 5 seconds.
Place the dental guard on your upper teeth, and bite down. DO NOT BITE DOWN TOO HARD. Biting down too hard may result in holes forming in the bottom of the dental guard.
Close your lips together and suck out all the air and water until the dental guard forms to a tight fit around your teeth.
Use your tongue to provide firm pressure to the inside walls, while using your fingers to press your lips and cheeks to the outside walls of the dental guard. Hold for 10 seconds.
Remove the dental guard and rinse in cold water for 10 seconds. The dental guard should fit snugly when placed back on your teeth.
If the dental guard is too loose, simply repeat the custom fitting process one more time, and use more pressure during forming.
IMPORTANT: Inspect the dental guard after each night’s use for signs of wear. If there are any holes through the bite surface or evidence of significant damage, please dispose of the dental guard and custom fit a new one. Otherwise, rinse the dental guard in warm water and place in storage case for next use.
How-to video
Do Not Use
Any dental product without first consulting with a dentist.
As an athletic guard.
If you are under 18 years of age.
If you have TMJ pain or clicking of the jaw.
If you have teeth or jaw pain.
If you have loose teeth.
If you have dental implants, braces, dentures, or other dental appliances.
For more than 3 months without consulting with a dentist. Ask a dentist before use if you have:
Serious health problems such as respiratory issues,
Mouth sores, bleeding gums, or gum disease,
Cavities without fillings, loose fillings or tooth caps,
Difficulty chewing, jaw or teeth pain.
Two or more missing teeth. Stop use and ask a dentist if:
You develop loose teeth or a change in your bite,
Experience pain, bleeding gums or other irregularities.
The product falls out of your mouth easily or causes you to Gag,
The product disrupts breathing. See a dentist every 6 months.
Buy now Protect-ItCan it be refitted?
Yes, It can be fitted up to 2 times.
Does it go on the upper or lower teeth?
It is designed for the upper teeth.
Does it contain latex?
No.
Is Protect-It BPA-free?
Yes, Protect-It is completely free of BPA.
Can a child wear it?
No. All dental guards for bruxism (teeth grinding) are intended for use for ages 18 and up. Children under the age of 18 are still in development so dental guards for bruxism are not recommended.
Can I use Protect-It as a sports mouthguard?
No. Protect-It is not designed for impact protection and should only be used for nighttime teeth grinding (bruxism), not for athletic activities.
Can I use Protect-It with braces, dentures, caps, crowns, or other dental work?
If you have dental appliances such as crowns, caps, or bridges, please consult your dentist before using Protect-It. It should not be used with braces or dentures, as a proper fit may not be achievable.
What is it made of?
It is made of medical grade EVA, which is on file with the FDA and deemed safe and effective for use.
Can I wear it during the day?
It is designed to be worn at night while sleeping.
I have TMJ, can I use this product?
Please consult with your dentist. It is not advised to use if you have TMJ.
How long can I use Protect-It?
Protect-It is intended for short-term use. Check it after each night's use for signs of wear. If you notice holes, thinning, or damage, discard it and fit a new one.
How do I fit Protect-It?
Before molding, rinse the guard with warm water and test the fit. If it feels too long or bulky, you may trim it with scissors for a better fit. Once trimmed to the proper size, simply follow the instructions to heat and form your dental guard.
How do I clean Protect-It?
After each use, rinse Protect-It with warm water and store it in the provided case. For deeper cleaning, use a toothbrush and non-abrasive toothpaste.
-
FULL COVERAGE DENTAL GUARDPro-Comfort InstructionsHow-to videoFAQs
Step 1: Heat water, 2-3 inches deep, until it reaches a rolling boil.
Step 2: Remove boiling water from heating source and let stand for 10 seconds.
Step 3: Carefully submerge the Pro-Comfort in the hot water for 30 seconds.
Step 4: Using the slotted spoon or fork, carefully remove the Pro-Comfort from the hot water.
CAUTION: Before placing the Pro-Comfort in your mouth, test its temperature with the tip of your finger. The Pro-Comfort should be at a warm and comfortable temperature.
Step 5: Using a mirror, center the dental guard on your upper front teeth and the sides below your molars.
Step 6: Gently bite down on the Pro-Comfort, and form the material to your teeth and gums by sliding and pressing your fingertips inside your mouth or against your cheeks. NOTE: Do not clench down excessively.
Step 7: Press your tongue firmly against the roof of your mouth, and with a light sucking action, create a vacuum chamber effect by drawing out all the air and water.
Step 8: Continue forming the Pro-Comfort with your fingertips.
Step 9: After a total of at least 2 minutes in your mouth, place the Pro-Comfort in a bowl of cold water for 5 minutes.
Step 10: You should now have a snug, custom-fit Pro-Comfort. If necessary, you may repeat the fitting process 1 more time to improve your fit.
After each use, inspect your Pro-Comfort for excess wear. If grind-through is detected, it is time to replace your dental guard before the next use. Otherwise, brush your dental guard with toothpaste and rinse with cool water. Avoid using hot water. Dry thoroughly and use the provided case to store your Pro-Comfort when not in use.
How-to video
Do not use: Any dental product without first consulting with a dentist; As an athletic guard; If you are under 18 years of age; If you have TMJ pain or clicking of the jaw; If you have teeth or jaw pain; If you have loose teeth; If you have dental implants, braces, dentures, or other dental appliances; For more than 3 months without consulting with a dentist. Ask a dentist before use if you have: Serious health problems such as respiratory issues; Mouth sores, bleeding gums, or gum disease; Cavities without fillings, loose fillings or tooth caps; Difficulty chewing, jaw or teeth pain; Two or more missing teeth. Stop use and ask a dentist if: You develop loose teeth or a change in your bite; Experience pain, bleeding gums or other irregularities; The product falls out of your mouth easily or causes you to gag; The product disrupts breathing. See a dentist every 6 months.
Buy now Pro-ComfortCan it be refitted?
Yes, It can be fitted up to 2 times.
Does it go on the upper or lower teeth?
It is designed for the upper teeth.
Does it contain latex?
No
Can a child wear it?
No. All dental guards for bruxism (teeth grinding) are intended for use for ages 18 and up. Children under the age of 18 are still in development so dental guards for bruxism are not recommended.
Does it adhere to dental work like caps?
Please consult with your dentist before using a dental guard with any dental appliances. Any dental work could prohibit from getting a proper fit.
Can I wear it during the day?
It is designed to be worn at night while sleeping.
I have TMJ, can I use this product?
Please consult with your dentist. It is not advised to use if you have TMJ.
What if I don't get a good fitting and it falls off?
Sometimes it doesn't seem the material softens enough to mold to the bottom teeth. Try to refit the guard and leave it in the hot water for 45 seconds vs the 30 seconds on the directions. Also, be careful not to bite down too hard.
My teeth hurt after fitting, what should I do?
It may take up to a week to get used to a new device in the mouth, but do not continue prolonged use if the pain is still there after a week.
-
ORAL CARE KITOral Care Kit InstructionsHow-to video
Dental Scaler: Hold the tool so that the top of the curve is flat against the tooth. Gently pull away from the gum line toward the biting edge of each tooth. Use weekly.
Dental Pick: Place pick at the gum line between the teeth and gently pull away from the gum line to remove food. Use weekly.
Tongue Cleaner: Place the tongue cleaner on the back of your tongue and pull forward, lightly skimming the surface of your tongue. Rinse tongue cleaner with warm water and repeat as needed.
After use, rinse tools with warm water and allow to air dry. Both scaler and pick are made from soft steel that safely cleans without damaging tooth enamel if used as directed.
How-to video
Buy now Oral Care KitFor adult use only. Follow instructions carefully. Certain elements found in dental plaque may cause clotting and an increased risk of heart disease in some people. Regularly rinse mouth thoroughly during use. Do not swallow material removed. If bleeding of the gums occurs, stop and consult your dentist. For additional instructions consult your dentist.
Caution: Use only light pressure when cleaning your tongue. Like your toothbrush, you should replace your tongue cleaner every 3 months.
-
ORTHODONTIC FLOSS PICKSBraces Flosser InstructionsHow-to video
Insert flat side of the floss pick arm behind the wire of the braces and press floss gently between the teeth until it touches the gums. Using a gentle up and down motion, floss between teeth and under the gumline for best results. Remove food and debris from around the brackets and between teeth by using the soft bristled pick of the Braces Flosser.
How-to video
Buy now Braces FlosserCaution: Adult supervision recommended under age 10.
-
MEDICATED ORAL PAIN RELIEVERCanker Cover InstructionsHow-to videoFAQs
Adults and children 5 years of age and older, apply up to 3 tablets a day, as needed. Place the tablet on a clean, dry finger with the white side up. Place the white side on the sore and hold in place for 10 seconds. If sore is difficult to reach (in the fold between the cheek and gum or near the teeth or lip) break the tablet along the score and use half. Some discomfort may occur during the first few minutes, but will quickly subside, followed by hours of soothing relief. Within 30 minutes the tablet forms a clear, gel-like bandage that seals and protects the sore for hours before dissolving. Do not remove the tablet before it dissolves. In case of discomfort, the tablet may be removed by gently peeling the tablet from the sides while washing with warm water. Do not use any instrument to remove the tablet.
Children under 5 years, ask a doctor
How-to video
Do not use this product for more than 7 days unless directed by a dentist or doctor.
Stop use and ask a dentist or doctor if:
- Sore mouth symptoms do not improve in 7 days.
- Irritation, pain or redness worsens.
- Swelling, rash or fever develops.
Do not exceed recommended dosage.
If pregnant or breast-feeding or taking prescription drugs, ask a health care professional before use.
Keep out of reach of children.
In case of accidental overdose, get medical help or contact a Poison Control Center (1-800-222-1222) right away.
What are oral sores (aphthas)?
Oral sores (aphthas) are a common and bothersome phenomenon caused by wounding the mucosa while chewing, biting the cheek or tongue, dental treatment etc. Oral sores (aphthas) also appear against the background of various viral diseases, especially herpes. RAS disease (recurring aphthas), causes frequent and repeated oral ulcers.
How does Canker Cover relieve mouth ulcers?
Canker Cover is a small adhesive oral tablet that creates a gel-like barrier to cover the oral sore (aphtha). This oral tablet adheres to the oral mucosa and protects the sore area - mechanically and biologically. The Canker Cover oral tablet prevents secondary infections. Moreover, the oral tablet contains natural ingredients, which expedite the healing of oral sores (aphthas) and soothe and relieve pain.
How is Canker Cover used?
Canker Cover is easy and convenient to use. All that is required is to adhere the light side to the sore and apply pressure for 10 seconds. The oral tablet will adhere immediately and begin working, a process that lasts several hours.
Has Canker Cover been scientifically tested?
The creators of Canker Cover are comprised of top physicians and pharmacists who have accumulated years of comprehensive academic research on the phenomenon of mouth ulcers, the causes, and the most innovative and up-to-date treatment methods. The pharmacy staff developed the unique oral tablet, a registered patent. The oral tablet adheres to the oral sore (aphtha) and releases the active ingredients for a prolonged time. Canker Cover has been tested on hundreds of patients who suffered from oral sores (aphthas) for a range of reasons and proved again and again its especially high effectiveness.
What do the dentists and pharmacists say?
The professionals who examined Canker Cover had no doubt about the quality and effectiveness of the product. The dentists who examined Canker Cover in real time, and on patients who were "hopeless" had difficulty concealing their enthusiasm about Canker Cover, and have already been recommending it warmly to any patient who they believe can benefit from this innovative oral tablet. The first pharmacists that were introduced to the product responded favorably to its elegance in application and the low price.
For whom & when is Canker Cover treatment suitable?
Treatment with Canker Cover is suitable for any person suffering from oral sores (aphthas) as a result of mucosa injury sustained while chewing, biting the cheek or the tongue, dental care, etc. Canker Cover is especially effective against oral sores (aphthas) that appear against the background of various viral diseases, especially herpes, RAS disease - repeated oral sores (aphthas) - from unknown origin and mouth ulcers associated with allergies.
Is Canker Cover suitable for diabetics or people with other general diseases?
Canker Cover does not contain sugar, only Xylitol. This sweetener is barely absorbed into the digestive system, and constitutes an excellent substitute for sugar in diabetics. In general, people who suffer from diabetes or from other general diseases can use Canker Cover without any restriction.
Is Canker Cover suitable for pregnant women?
Ask your healthcare provider before using.
Is Canker Cover safe?
Canker Cover is safe, and contains substances approved for use by the strictest FDA Pharmaceutical standards. Canker Cover does not contain steroids and does not contain preservatives, sugar, or food coloring.
What happens if Canker Cover is swallowed?
The ingredients of Canker Cover will naturally digest without implications.
How long does Canker Cover last?
Canker Cover lasts up to 12 hours. We recommend allowing to fully dissolve on it's own.
Can I remove Canker Cover?
We do not recommend removing Canker Cover once it has adhered. Doing so may slow healing and cause additional pain.
How many times a day should it be used?
Canker Cover is an innovative oral tablet which is applied to oral sores (aphthas). The oral tablet dissolves slowly over a few hours, thus it does not have to be removed. When the tablet fully dissolves, a new Canker Cover oral tablet can be used, assuming that it is still necessary. It is recommended that the oral sore (aphtha) area be rinsed, in case the oral tablet did not dissolve totally.
How does it differ from other treatments?
Canker Cover is different mainly because of its unique application, which does not need to be spread like gel and does not leave a bad taste in the mouth. In fact, the special oral tablet contains two sides, one side that adheres and an external side with a pleasant taste that freshens the mouth.
What does each tablet contain?
The active ingredients are from natural materials, in low concentration, which have a proven effect in healing oral sores (aphthas). In addition, the oral tablet contains vitamin A and natural flavors that freshen the oral cavity. Canker Cover does not contain preservatives, sugar, or food coloring.
Where was Canker Cover developed?
Canker Cover was developed by a Swiss research company and underwent clinical trials in Israel.
Is it a breakthrough?
Indeed it is a breakthrough! Not only because of its innovative treatment and the simplicity of applying the oral tablet, but also because of the effect of the oral tablet ingredients that expedite the healing of sores and decrease the likelihood of reoccurrence of new oral sores (aphthas).
What causes canker sores?
Canker sores can be triggered by various factors, and understanding these causes is crucial for effective management. While the exact cause remains uncertain, potential factors include:
- Chemotherapy: Patients undergoing chemotherapy may experience increased susceptibility to Apthous Stomatitis, more commonly known as canker sores.
- Radiation Treatment: Individuals receiving radiation treatment may develop canker sores as a side effect.
- Chemoradiation Treatment: Stress and Immune System: Stress and a weakened immune system are common contributors to canker sores.
- Nutritional Deficiencies: Lack of certain vitamins and minerals, such as B12, iron, and zinc, can contribute to the development of canker sores.
Buy now Canker CoverActive Ingredient: Menthol
Inactive Ingredients: annato, carbomer homopolymer type a, citrus oil, hydroxypropl cellulose, magnesium chloride, povidone K30, povidone K90, silicon dioxide, xylitol
-
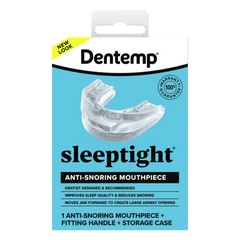
ANTI-SNORING MOUTHPIECESleepTight InstructionsHow-to videoFAQs
Bring a small pot of water to a rolling boil, then pour the water into a bowl or cup.
Wait 10 seconds, then carefully submerge the SleepTight in the hot water for 2-1/2 minutes. Use a spoon to help hold it completely underwater.
Carefully remove the SleepTight from the hot water to begin fitting. If the edges have folded over, straighten them back into the original horseshoe shape.
CAUTION: Before placing the SleepTight in your mouth, test its temperature with the tip of your finger. The SleepTight should be at a warm and comfortable temperature.
Using a mirror, carefully place the SleepTight on your lower teeth. Make sure that it is centered on your teeth, with the V-shape notch at the top.
Align upper teeth into the tray and gently bite down on the SleepTight. You may need to move your jaw slightly forward. NOTE: Do not clench down excessively.
Compress all soft material with your fingers against the teeth and gums.
Suck in and push the tongue against the sides of the soft material, especially the front upper. Continue until the SleepTight becomes solid and reaches body temperature.
After the SleepTight is firm, place it in a bowl of cold water for 5 minutes.You should now have a snug, custom-fit SleepTight. If necessary, you may repeat the fitting process 1 more time to improve your fit.
To remove the fitting handle, squeeze the front sides and slide off the front retainer clip, then slide out the main part from the inside. If additional fitting is desired, you can follow the same steps.
After each use, rinse your SleepTight with cool running water and a small amount of liquid anti-bacterial soap. Never use hot water. If debris remains, you can use a very soft toothbrush or cotton swab. Avoid toothpastes containing abrasives, which can damage the soft surface. Never use bleach, alcohol or other strong chemicals.
Weekly soaking with an approved oral appliance cleaner can help with staining and freshness and kill harmful bacteria.
How-to video
This device should not be used by persons with asthma, central sleep apnea or severe respiratory disorders. If you have loose teeth, advanced periodontal disease, TMJ (Jaw joint pain) or other dental problems consult your dentist before using this device. Use of this device may cause temporary dental problems including increased salivation or possible mouth breathing. If you experience ongoing TMJ pain, gum irritation, bite problems, loose teeth or other dental problems; you should discontinue use of the device and seek dental or medical help. Non-sterile.
Buy now SleepTightCan it be refitted?
Yes, It can be fitted up to 2 times.
Does it go on the upper or lower teeth?
It is designed to fit both the upper and lower teeth.
Can I use SleepTight with dentures, braces, or other dental work?
SleepTight is not recommended for use with dentures or braces. If you have crowns, caps, or other dental appliances, consult your dentist before use, as these may cause issues or prevent a proper fit.
Does it contain latex?
No.
Is SleepTight BPA-free?
Yes, SleepTight is made from BPA-free materials for your safety and peace of mind.
How do I use the SleepTight Mouthpiece?
Simply place the SleepTight Mouthpiece in your mouth. Close into the pre-fitted teeth imprints. Position your tongue forward into the airway opening. This positioning allows for gentle retention of the tongue to help open the airway and reduce snoring. If you wake up place the tongue back into the airway space unless you have some nasal obstruction.
How do I make sure it's positioned correctly?
When fitting your SleepTight, make sure the alignment notch is centered in your mouth. Proper placement is essential for comfort and effectiveness.
When will the snoring improve?
For most people you will know the first night, if your snoring improves. If your snoring is better even for a short while, then you know that the mouthpiece is helping. Refitting the jaw more forward after a few days may also help improve your snoring. If you do not see improvement, you may want to contact your medical or dental provider for other treatment options.
How do I know the SleepTight Mouthpiece will work?
The mouthpiece solution for snoring has been medically validated. The American Academy of Sleep Medicine, American Academy of Family Physicians, the American Academy of Dental Sleep Medicine and the scientific journal "Sleep and Breathing" all recommend the use of a mouthpiece for the treatment of snoring.
How long does it take to get used to it?
Within a few nights. The adjustment phase obviously varies from person to person. Usually within a week or two most of the side effects have diminished or disappeared. We recommend using the SleepTight Mouthpiece for at least 5 nights before making any adjustments.
How can I keep my mouthpiece in because it falls out?
This is usually caused from a poor initial fitting process. Nighttime clenching and grinding can stretch and loosen the mouthpiece too. The SleepTight Mouthpiece was engineered with a dual laminate design to help resist this stretching.
You can improve the retention by using one or more of the following steps:
- Refit the mouthpiece and concentrate on compression of the softened material toward the gums and teeth with firm finger and tongue pressure,
- Sleep on your side. The jaw naturally drops back when you sleep on your back which causes lower jaw to drop back and lose its retention in the device. Back sleepers always have this issue no matter what device is used,
- With the device in place, place your tongue forward into the opening, gently bite down and suck and swallow all your saliva. There will be a noticeable suction effect which will hold the jaws in their proper position. It might need to be repeated during the night.
- You could be interfering with the device during sleep with your tongue; wear the device during the day to get used to the feeling and speed up the adjustment period.
Why are my teeth sore or loose?
This usually passes in two weeks or less. This is caused from the pressure applied to the teeth while the jaw is being held forward. This situation is rare with the SleepTight Mouthpiece since it offers an improved customized fit and the jaw position is held forward by the side teeth too, not just the front teeth. You are more likely to have teeth soreness, if you have only front teeth. If the condition does not improve gradually you can perform the following: Refit the device to a position with the jaw less forward; move your lower jaw backward.
Why is the airway small or mostly obstructed?
This occurs when the fitting handle is not fully inserted or clicked into place or the tongue is not used to push the material up against the palate and tissue behind the lower teeth. Refit and perform compression with the tongue in the front inside portion of the device. A new device may be necessary if the opening is closed or very small.
How can I remove the fitting handle?
To remove the fitting handle, slide out from the inside of the mouthpiece. Keep the fitting handle and use the same steps if additional fitting is desired.
How often should I clean SleepTight?
Clean your mouthpiece after every use. Rinse with cool water and a small amount of liquid antibacterial soap. Avoid hot water and abrasive toothpastes, which can damage the material.
For deeper cleaning, gently use a soft toothbrush or cotton swab to remove debris.To help reduce staining and bacteria, soak your SleepTight weekly in an approved oral appliance cleaner, like OrVance Retainer Cleaner.
Never use bleach, alcohol, or harsh chemicals.
-
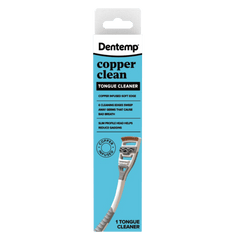
TONGUE CLEANERCopper Clean Instructions
Place the tongue cleaner on the back of your tongue and pull forward, lightly skimming the surface of your tongue. Rinse tongue cleaner with warm water and repeat as needed.
Like your toothbrush, you should replace your tongue cleaner every 3 months.
Buy now Copper CleanUse only light pressure when cleaning your tongue. Like your toothbrush, you should replace your tongue cleaner every 3 months.



Good to know
EugenolCap & Filling Repair

Oral sores (aphthas)Canker Cover

What are oral sores (aphthas)?
Oral sores (aphthas) are a common and bothersome phenomenon caused by wounding the mucosa while chewing, biting the cheek or tongue, dental treatment etc. Oral sores (aphthas) also appear against the background of various viral diseases, especially herpes. RAS disease (recurring aphthas), causes frequent and repeated oral ulcers.
BruxismProtect-It

Can I use Protect-It as a sports mouthguard?
No. Protect-It is not designed for impact protection and should only be used for nighttime teeth grinding (bruxism), not for athletic activities.
Denture relinerReline-It
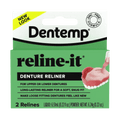
Is Reline-It a denture adhesive?
No, Reline-It is a denture reliner. It does not adhere directly to your gums but rather gives your dentures a better fit.
MethacrylatesReline-It
Can I use this product if I’m sensitive to methacrylates?
No, do not use Reline-It if you have a known sensitivity to methacrylates or other ingredients.
TMJOra-GUARD
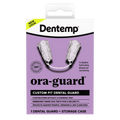
I have TMJ, can I use this product?
Please consult with your dentist. It is not advised to use if you have TMJ.
Refitting a guardOra-GUARD
Guards and dental workOra-GUARD
Does it adhere to dental work like caps?
Please consult with your dentist before using a dental guard with any dental appliances. Any dental work could prohibit from getting a proper fit.
Jaw discomfortOra-GUARD
Is jaw discomfort normal?
Mild discomfort can occur as your mouth adjusts to a new device. This typically resolves within a week. If pain persists beyond that time, discontinue use and speak with your dentist. Ora-GUARD is not recommended for individuals with TMJ disorders.
Posts and implantsCap & Filling Repair
Should Dentemp be used on a post or implant?
It differs from case to case. Before using on a post or implant, seek your dentist’s advice.
BridgesRecap-It

Can product be used to recement bridges or other dental appliances?
No. This product is only for recementing caps/crowns.
Broken toothCap & Filling Repair
Can Dentemp be used to repair a broken tooth?
No. You should consult your dentist.
Throbbing pain or swellingCap & Filling Repair
Should I use Dentemp if I have throbbing pain or swelling in the affected area?
No. You should consult your dentist immediately. This may be an indication of infection.
Flexible (Valplast) denturesRepair-It
Expiration dateReline-It
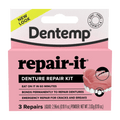
Can I use Reline-It past its expiration date?
We do not recommend using the product past its expiration date, as we cannot guarantee its effectiveness.
Swallowing Canker CoverCanker Cover
What happens if Canker Cover is swallowed?
The ingredients of Canker Cover will naturally digest without implications.
GlutenCap & Filling Repair
PregnancyCap & Filling Repair
No terms match. Try another word.